
Technical corner
Operating in the FT8 mode with the IC-7300
FB News readers who read the technical article “Operating the FT8 mode with the IC-7610”, described in the December 2017 issue, asked us to show the settings for the IC-7300. Our FB News staff will explain that in this issue. Only a USB cable should be used to connect between your IC-7300 and a PC. We hope many hams enjoy the FT8 mode.
You need to install a USB driver software onto your PC before connecting to the IC-7300. Download the latest* USB driver software for the IC-7300 from the Icom web-site and install onto your PC before connecting to the IC-7300.
*Ver. 1.20 is the latest as of April 2018.
http://www.icom.co.jp/world/support/download/firm/IC-7600/usb1_20/
http://physics.princeton.edu/pulsar/k1jt/wsjtx.html
Next, you need to download the WJST-X software* from the K1JT home page and install it into your PC.
https://physics.princeton.edu/pulsar/k1jt/wsjtx.html
* Ver. 1.8.0 is the latest version as of April 2018.
Connect a USB cable between the USB port on the IC-7300 and a USB port on your PC.
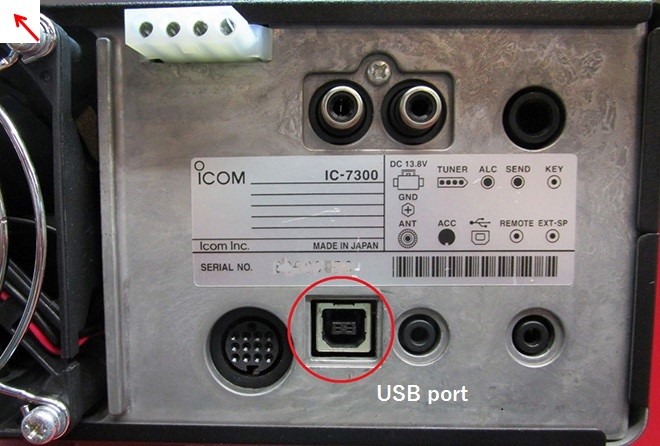
USB port: Shown above.
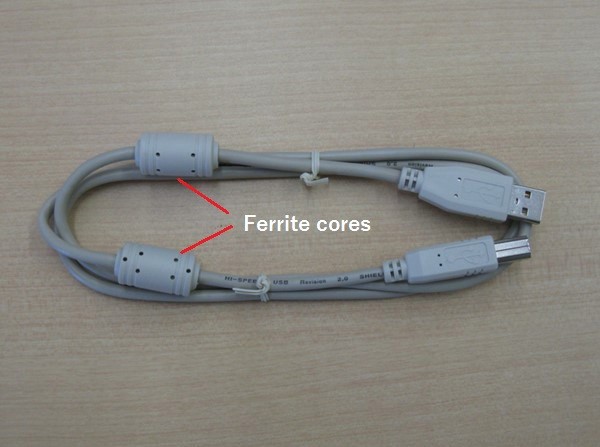
An example of a USB cable
(This cable does not come with the IC-7300.) We recommend that you use a USB cable with ferrite cores attached, to prevent RF feedback.
After the USB cable is connected, and the IC-7300 is turned ON, your PC will automatically recognize that the IC-7300 is connected. Note the COM port number to also use for the IC-7300 settings.
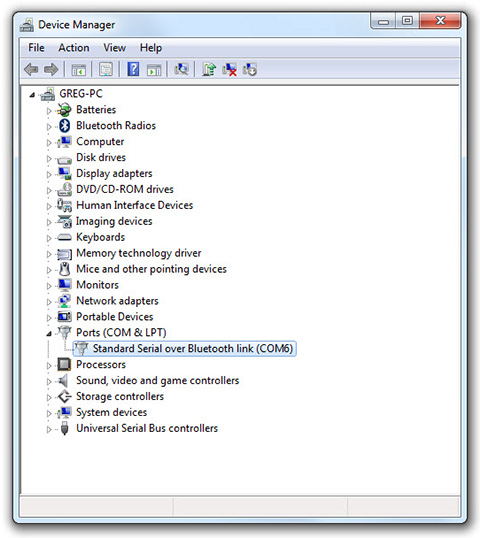
This example screen shows that COM port 6 is open.
Setting the IC-7300
You will operate in the FT8 mode with your PC through only the USB cable in this issue. You need to set the IC-7300 for modulation and demodulation through the USB port. First, do the following procedures to input the modulation signal from the USB port in the USB DATA mode.
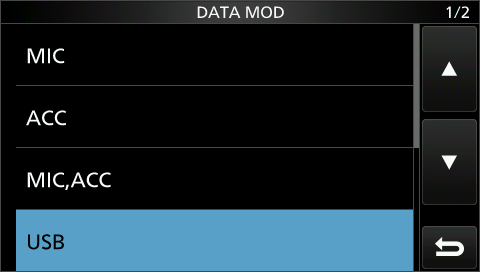
・SET mode External terminal Modulation Input(DATA ON). Then, change “ACC to “USB.”
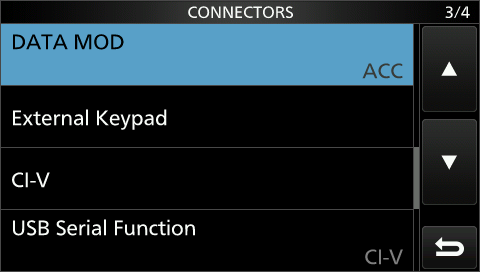
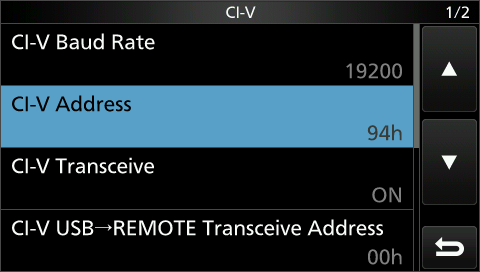
Next, set the CI-V parameters for the standby and frequency controls as follows.
Touch SET mode External terminal CI-V. Then, set as following parameters:
1. CI-V Baud Rate: Auto 19200 (or other fixed baud rate)
2. CI-V address: 94h
3. CI-V USB port: Link to [REMOTE]
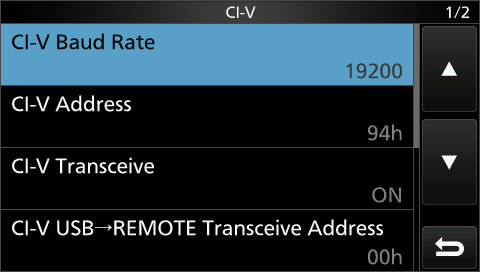
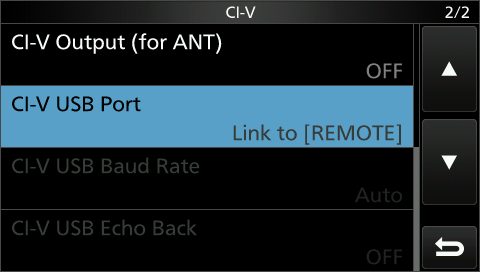
The setting parameters for the IC-7300 are finished.
Settings for the WSJT-X software
Open the WSJT-X application. Select the “General” tab in “File””Settings””General.” Input your call sign and your grid location. Input other parameters, according to your operating environment.
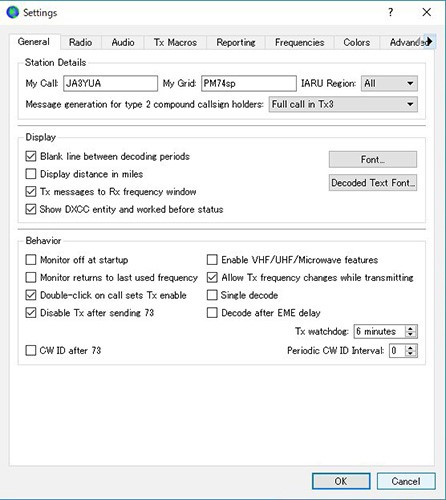
If you are not sure of each setting, just use the same settings shown above for simple operations. However, you must input your own call sign and your grid location instead of the examples shown above.
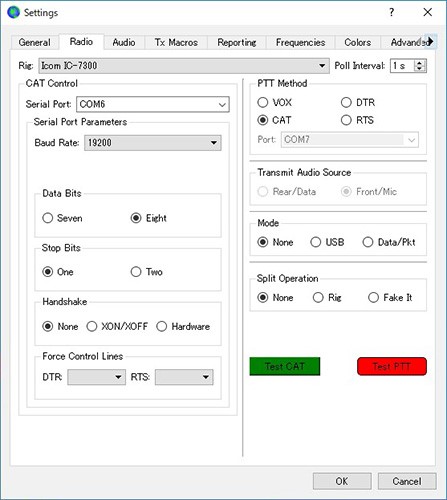
Next, click the “Radio” tab to enter the settings for the Radio parameters.
1. elect “Icom IC-7300” as the Rig setting.
2. Select the same COM port as the one you noted in the previous settings. (The example screen shot shows that COM 6 is selected.)
3. Set the Baud rate for 19200 (or the rate you set in the CI-V screen above.)
4. Other settings should be the same as shown in the screen above.
5. Click “Test CAT” in the right bottom corner. If the “Test PTT” indicator changes to red, and the IC-7300 starts transmitting, all settings are properly made. (Note: The IC-7300 just changes to the transmit mode, but no modulated signal is transmitted.
6. Click “Test PTT” again to return to the receive mode.
For the last settings, click the “Audio” tab.
1. Set “Soundcard Input” for Microphone (USB Audio CODEC).
2. Set “Soundcard Output” for Speaker (USB Audio CODEC).
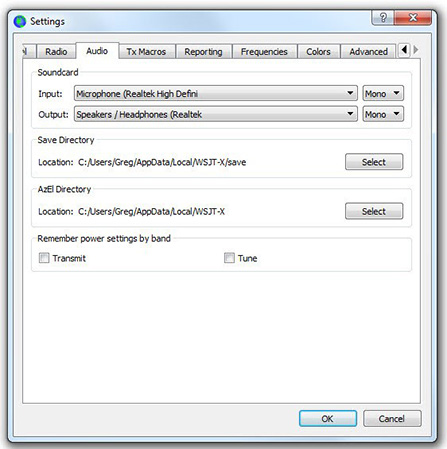
There are other settings shown above that can be set this time, but you do not need to set them for basic FT8 operations. After all the settings are done, make sure you push “OK” at the bottom of the screen.
Operating
1. Turn the IC-7300 power ON. Then, run the WSJT-X application.
Note: Do not reverse the turn ON order, otherwise an error may be displayed on your PC.
2. Set your PC clock accurately. (An error must not be more than 1 second,)
3. Select an operating band in the band selection pull-down menu.
・The IC-7300’s display automatically changes to 14.074 MHz when you select the 20 meter band.
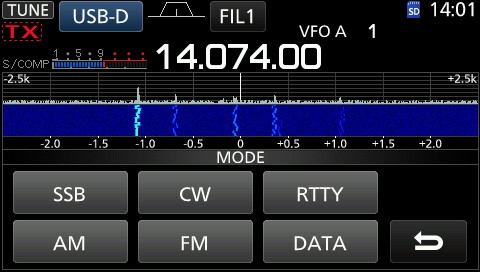
4. Set the mode to USB, then touch “DATA” to select the “USB-D” mode.
5. Set the IF filter bandwidth (BW) to 3.0 kHz for the USB-D mode, as shown below.
(1) Touch “FILx” in the Filter screen to select the desired filter.
(2) Touch “BW” to highlight the bandwidth.
(3) To adjust the filter bandwidth to 3.0 kHz, rotate the Main knob.
(4) Touch Sharp or Soft, and then push [EXIT] to close the Filter screen.
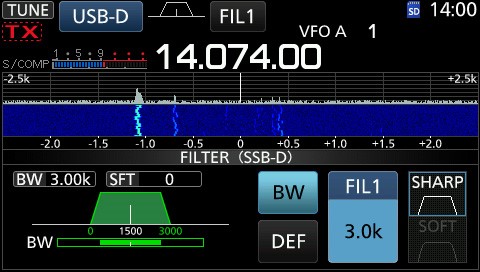
Example setting: BW for 3.0 kHz (FT8 signal is being received.)
6. The WSJT-X screen shows the decoding results every 15 seconds, as shown in the screen example. For stations that are calling CQ, the decoded results are shown in pink.
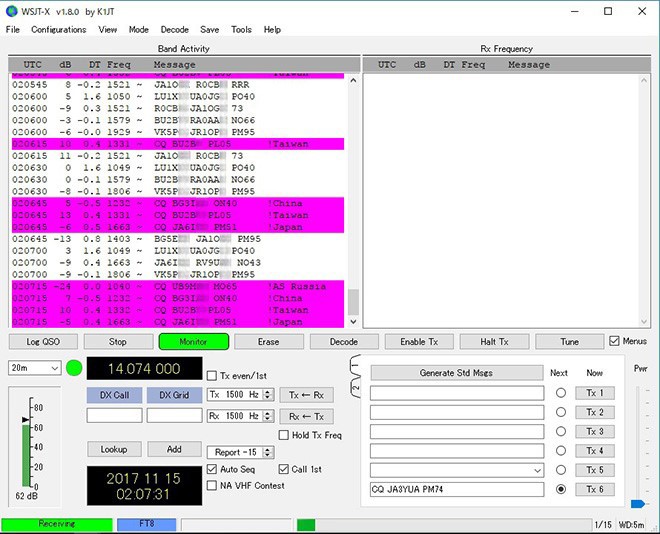
7. First of all, you should watch an FT8 QSO to understand how a QSO proceeds. We recommend that you watch for at least an hour.
8. Pick a CQ station (pink color) that you want to make a QSO with in the list, and left double-click on the station display. When the IC-7300 starts transmitting, adjust the “Pwr” slide bar to set the output power you want.
9. When the station you chose calls back, the IC-7300 automatically transmits and receives repeated through the QSO, every 15 seconds. When the QSO is finished, the IC-7300 stops transmitting.
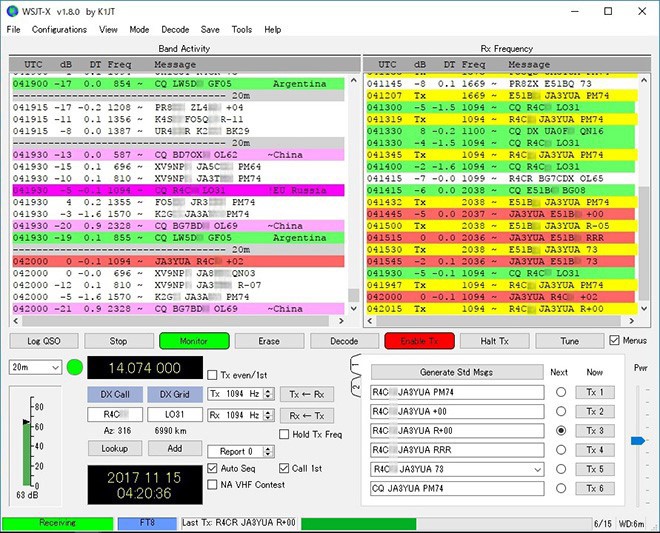
QSO example: JA3YUA worked E51B#, then after the QSO worked R4C#.
The IC-7300 repeatedly transmits and receives if there is no response from the station for some reason.
10. If you have no call back from the station and the target station again transmits CQ, the IC-7300 repeatedly transmits automatically. If you again have no call back to your reply, your signal somehow may not have reached the target station. In that case, click “Enable Tx” to cancel the contact attempt.
11. If the target station calls to another station, your transmission automatically stops.
12. If you fortunately receive a reply from the target station, and the QSO is finished, click “Log QSO” to store the QSO into the WSJT-X log as QSO data.
The popularity of FT8 caught fire immediately after the mode was available in July, 2017, and stations all over the world are going on air. So by choosing a band well, FT8 QSOs are possible any time of the day or night. If you have not yet experienced operating in the FT8 mode, we recommend you install the software and watch QSOs for a while first.
(Alternative)
(If you have not yet experienced making a FT8 QSO, we recommend you install the software and watch QSOs for a while first, and then when you are comfortable, try to make one.)
Reference article
・The IC-7610 Gives Three Great Innovations to Amateur Radio. The special issue.